Best portable fish finder for kayak fishing
One of the biggest struggles for kayak anglers is feeling like you're missing out on what's happening beneath your hull. Without the luxury of a big boat's permanent electronics, it can be tough to locate structure, schools of fish, or even figure out the depth you're fishing. This guide is all about helping you navigate the sometimes overwhelming world of portable fish finders, so you can confidently find the best one to elevate your kayak fishing adventures here in Alberta.
Why a Portable Fish Finder is a Game-Changer for Kayak Fishing
Let's face it, fishing from a kayak is an entirely different beast than being in a traditional powerboat. You're closer to the water, more stealthy, and you can get into places bigger boats simply can't. But this intimacy with the water often comes with a trade-off: electronics. Trying to install a full-sized, fixed fish finder on a kayak can be a logistical nightmare of wiring, battery placement, and permanent mounting that many paddlers just don't want to deal with. That's where portable units truly shine, transforming your small craft into a high-tech fishing machine without all the fuss.
The Kayak Advantage: Stealth Meets Technology
Kayak anglers inherently have an advantage when it comes to stealth. Paddling quietly allows you to approach fish without spooking them, especially in shallower waters or tight cover. Adding a portable fish finder complements this stealth perfectly. Instead of blindly casting, you can quietly paddle over an area, scan for drop-offs, weed lines, or schooling baitfish, and then position yourself for the perfect presentation. It means less wasted time casting where fish aren't, and more time actively fishing productive water. For instance, when you're targeting elusive Bull Trout: Alberta's Threatened Native Fish in a mountain stream, knowing the exact depth of a holding pool can be the difference between a frustrating day and a successful catch-and-release.
Portability Perks: Versatility for Every Trip
The beauty of a portable fish finder lies in its name: it's portable. This means you can easily move it between different kayaks, use it for bank fishing, or even take it ice fishing in the winter. Imagine being able to scout a new lake from your kayak in the summer, then use the very same unit to find schools of perch or burbot through the ice later in the year. There's no permanent installation required, no cutting into your kayak, and often, setup takes mere minutes. This versatility is incredibly appealing for Alberta anglers who enjoy a variety of fishing pursuits, from paddling the quiet backwaters of the North Saskatchewan River to exploring the expansive Best Fishing Lakes in Alberta. Many units are designed to be compact and lightweight, making them easy to pack in a dry bag alongside your other essential gear.
Key Features to Look For in a Portable Fish Finder for Kayaks
When you're trying to pick out a portable fish finder, it's easy to get bogged down in all the technical jargon. But for kayak fishing, a few core features truly make a difference. We're looking for efficiency, durability, and enough clarity to give you a real advantage without overwhelming your small craft. Think about how you fish and what information is most valuable to you on the water.
Transducer Technology: Seeing Beneath the Surface
The transducer is the "eye" of your fish finder, sending out sonar waves and interpreting the returning echoes. For kayak fishing, you'll generally encounter a few main types of technology:
- Traditional Sonar (2D Sonar): This is your bread and butter. It provides a real-time view of what's directly beneath your kayak, showing fish arches, bottom contours, and structure. It's usually more than enough for most kayak anglers, especially those just starting out. Look for units with dual-beam or wide-angle cones for better coverage.
- CHIRP Sonar: A step up from traditional sonar, CHIRP (Compressed High-Intensity Radiated Pulse) sends a continuous sweep of frequencies, providing much clearer target separation and less clutter on the screen. This means you can often distinguish individual fish from bait balls, or even see fish tightly hugging the bottom. If you're serious about finding specific species or discerning subtle structure, CHIRP is a fantastic upgrade.
- Down Imaging/DownVu/ClearVü: These technologies (names vary by brand) give you a picture-like view of what's directly below your kayak, almost like an underwater photograph. It's excellent for identifying specific structures like submerged trees, rock piles, or old foundations, and seeing how fish are relating to them. While not essential for everyone, it can be a huge asset in unfamiliar waters.
- Side Imaging/SideVu/SideScan: This advanced sonar shoots beams out to the sides of your kayak, allowing you to scan a much wider area without having to paddle directly over it. For covering large flats, finding weed lines, or searching expansive lakes like Lesser Slave Lake for Best Walleye Lakes in Alberta, side imaging can dramatically increase your efficiency. However, these units tend to be more expensive and might be overkill for smaller kayaks or specific river fishing.
When you're browsing at stores like Bass Pro Shops or searching online at Amazon, pay close attention to the sonar capabilities listed. A good balance for kayak anglers is often a unit that combines CHIRP with Down Imaging, offering both excellent fish identification and clear structure views.
Display Type and Size: Clarity on the Water
Imagine trying to read a tiny, pixelated screen while you're paddling against a chop or with the sun glaring down. Not fun! The display is your window to the underwater world, so its quality and size are crucial.
- Screen Size: For kayaks, you generally want something that's easy to see but not so large it takes up too much precious deck space. Screens ranging from 3.5 to 7 inches are typically ideal. A larger screen (5-7 inches) offers better detail, especially if you're using advanced sonar like side imaging, but a smaller 3.5 or 4-inch screen is perfectly adequate for basic 2D sonar and portability.
- Resolution and Color: Higher resolution means a clearer, sharper image. A full-color display is almost a must these days, as it helps differentiate targets and bottom composition much more effectively than monochrome screens. Look for screens that boast strong backlighting and good contrast for readability in direct sunlight or low-light conditions. Many modern portable units offer excellent, bright displays that cut through glare, making it easier to interpret what you're seeing even on the brightest Alberta summer day.
Battery Life: Powering Your Adventure
Unlike a big boat with a dedicated cranking battery, portable fish finders rely on their own internal power source, or sometimes external small batteries. You absolutely do not want your fish finder dying on you just when the fish start biting!
- Internal vs. External Batteries: Many truly portable units come with built-in, rechargeable lithium-ion batteries, offering convenience and a compact footprint. These are fantastic for short trips or if you want minimal setup. Other units might require external 12V batteries (often small sealed lead-acid or even lighter lithium options), which can be bulkier but usually provide much longer run times.
- Advertised Run Time: Always check the manufacturer's stated battery life. For a full day of fishing (6-8 hours), you want a unit that can comfortably last. If you're planning longer trips or multiple days without recharging, an external battery pack or a unit known for exceptional battery efficiency will be critical. Consider bringing a portable power bank, especially for phones, which can often recharge smaller fish finder units as well.
GPS and Mapping Capabilities: Know Where You've Been and Where You're Going
While not strictly about finding fish, integrated GPS and mapping can turn your fish finder into a powerful navigation tool, making it incredibly useful for kayak anglers.
- Basic GPS: Even a simple GPS can mark waypoints (like that awesome weed bed or productive drop-off you just found), track your path, and show your speed. This is invaluable for returning to hot spots or safely navigating unfamiliar waters.
- Advanced Mapping (Chartplotter): Some portable units include detailed mapping with contour lines, navigation aids, and even the ability to create your own custom maps. This is where you can see exactly where that underwater humps is relative to your kayak, or follow a depth contour precisely. For big lakes like Cold Lake, where How to Catch Lake Trout in Alberta often involves specific depths and structures, a detailed map can be a huge advantage. Check if the unit comes pre-loaded with Canadian maps or if maps need to be purchased separately.
Ease of Mounting: Secure and Simple Setup
Kayaks offer limited real estate, so how easily and securely a fish finder mounts is a major concern. You don't want it bouncing off into the water after hitting a wave or wrestling a big northern pike!
- Transducer Mounting: This is often the trickiest part.
- Suction Cup Mounts: Great for portability, but can sometimes lose suction, especially in choppy water. Best for calm lakes or temporary use.
- Scupper Hole Mounts: Many modern fishing kayaks have "scupper holes" designed for transducer mounting. This offers a clean, protected installation, keeping the transducer submerged.
- Arm Mounts (RAM Mounts, etc.): These clamp onto your kayak and extend the transducer into the water. Highly versatile and secure, but the arm can sometimes get in the way.
- In-Hull Mounting: For kayaks without scupper holes, some transducers can shoot through the hull, often mounted with silicone or a specialized putty. This keeps the transducer completely protected but can sometimes reduce sensitivity.
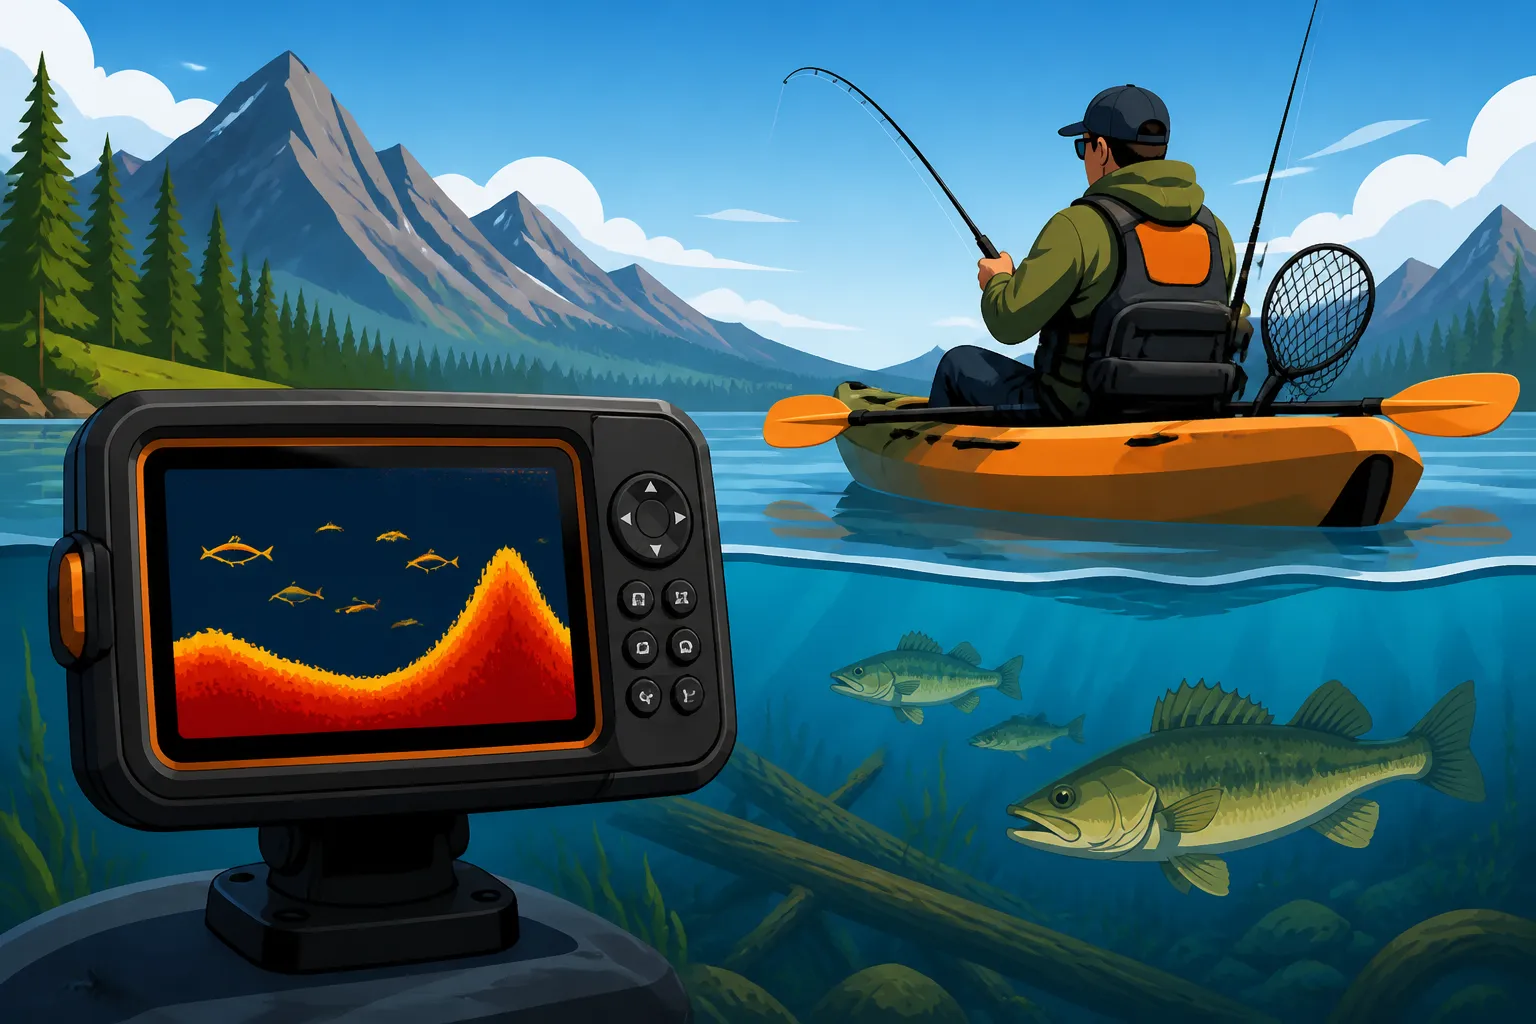
- Display Mounting: Many portable units come with their own bracket systems, often designed to slide into track mounts (like those from Railblaza or Scotty) that are common on fishing kayaks. Others might use a simple clamp or suction cup for the display itself. Ensure the mount keeps the screen stable, visible, and out of your way while paddling or fishing. A common setup involves a portable unit that sits on a small platform, with the transducer arm clamped to the side of the kayak, making it simple to deploy and retrieve.
Top Considerations for Alberta Kayak Anglers
Alberta's diverse fishing environments, from vast prairie lakes to fast-flowing mountain rivers, mean that what works for one angler might not be ideal for another. When choosing your portable fish finder, think about the specific conditions you'll encounter most often in our beautiful province.
Water Conditions and Depths
Alberta waters vary dramatically. Some prairie lakes can be stained and relatively shallow, while mountain lakes like Cold Lake plunge to incredible depths.
- Shallow vs. Deep Water Performance: If you primarily fish shallow rivers or smaller ponds, a basic 2D sonar unit with a good wide beam will serve you well. However, if you're exploring the depths of larger lakes for Best Techniques for Deep Water Summer Lake Trout, you'll want a unit with powerful CHIRP sonar that can penetrate deep water effectively and provide clear returns even at 100+ feet. Units designed for deeper water often have more powerful transducers, which is a key spec to look for.
- Water Clarity: In clearer mountain streams or lakes, high-resolution sonar can really shine, allowing you to pick out subtle details. In murkier prairie waters, target separation becomes even more critical to distinguish fish from debris. Down Imaging can be especially helpful in these situations for seeing defined structure.
Target Species: What Are You Hoping to Catch?
The fish you're after can influence the type of fish finder you need.
- Walleye and Pike: For species like walleye and pike, which often relate to structure, weed lines, and depth changes, a unit with good 2D sonar and Down Imaging is fantastic. It helps you pinpoint those specific ambush points. Many Alberta anglers chase How to Catch Northern Pike in Alberta in lakes like Keho or Gull, and being able to see submerged vegetation is a huge plus.
- Trout: When targeting trout in rivers or lakes, especially sensitive species like those found in Alberta's mountain streams, precise depth readings and the ability to mark subtle bottom changes are important. CHIRP can help identify individual fish in currents. If you're fly fishing, you might value portability and minimal interference above all else. For instance, knowing the river bottom profile on the Bow River can help identify holding lies for elusive brown trout.
Battery Performance in Cold Temperatures
We all know Alberta winters can be brutal, and many dedicated anglers still hit the ice or launch their kayaks during colder shoulder seasons. Batteries and electronics don't always perform optimally in frigid conditions.
- Lithium-Ion vs. Sealed Lead-Acid: Lithium-ion batteries generally perform better in the cold than traditional sealed lead-acid (SLA) batteries, maintaining their charge and output more effectively. If you're planning on cold-weather fishing, look for units with robust battery systems or consider aftermarket lithium power packs.
- Insulation and Protection: While not common for portable fish finders themselves, ensure your battery (if external) is kept in a protective, insulated bag to prolong its life in cold weather. Many portable units are designed with rugged, weatherproof casings, but extreme cold can still impact display clarity and overall performance.
Durability for Rough Waters and Transport
Kayak fishing, by its very nature, can involve some bumps and scrapes. Your gear needs to withstand being splashed, dropped, and jostled around.
- Water Resistance Rating (IPX Rating): Look for an IPX rating, typically IPX7, which means the unit can be submerged in 1 meter of water for 30 minutes without damage. This is essential for kayak fishing where splashes are inevitable, and an accidental drop could occur.
- Rugged Construction: Check reviews for overall build quality. A fish finder that feels solid and well-constructed will likely withstand the rigors of being transported in and out of your kayak and exposed to the elements. Units from reputable brands found at retailers like Bass Pro Shops or on Amazon often have a good reputation for durability. Even with the best gear, it’s a good idea to secure your portable fish finder to your kayak with a leash or tether, just in case.
Setting Up Your Portable Fish Finder on a Kayak
Once you've picked the perfect portable fish finder, the next step is getting it properly installed and ready for action on your kayak. Don't worry, it's usually much simpler than setting up electronics on a big boat, but a little planning goes a long way to ensure you get the best performance and a hassle-free experience.
Mounting Options: Finding the Right Spot
The goal is to get your transducer in the water and your display visible and secure, without interfering with your paddling or fishing.
- Through-Hull vs. Over-the-Side: As discussed, through-hull (scupper hole or in-hull shoot-through) mounts offer protection and a clean look. Over-the-side mounts, typically using a flexible arm or a clamping bracket, are incredibly versatile. Many kayak anglers prefer an over-the-side mount for a portable unit because it's quick to set up and remove, and allows you to adjust the transducer depth easily. If your kayak has track mounts, you can often find compatible bases for an arm mount that will secure your display and transducer arm. Best Kayak for Lesser Slave Lake or Best Kayak for River Fishing in Alberta might require different mounting considerations based on the hull design and typical water conditions.
- Display Placement: Position your display where it's easy to see without craning your neck or shifting your body too much. This usually means somewhere on the forward deck, often on a raised mount if possible, to minimize glare and keep it out of the splash zone. Ensure it doesn't block access to your tackle box, rod holders, or other essential gear.
Transducer Placement: Getting a Clear Signal
The transducer is critical, and its placement directly impacts the quality of your sonar readings.
- Keep it Clear: The transducer needs an unobstructed view of the water beneath your kayak. Avoid placing it directly behind a scupper hole that might create turbulence, or too close to any propellers from a Best Trolling Motor for a Fishing Kayak. Air bubbles passing under the transducer can disrupt the sonar signal, leading to patchy or inaccurate readings.
- Submerged Depth: Ensure the transducer is fully submerged in the water and running parallel to the bottom. If it's too shallow, it can come out of the water in chop, or if it's angled improperly, it won't give accurate returns. Some anglers use a small piece of foam or pool noodle on the transducer cable to help it float just at the right depth with over-the-side mounts.
- Cable Routing: Route the transducer cable carefully to avoid snags or damage. Use zip ties or cable clips to secure it along the side of your kayak or through existing rigging points. Keep it away from moving parts or sharp edges.
Powering Your Unit: Battery Management
For maximum convenience, most portable units come with everything you need. If you're using an external battery, a little thought about placement is key.
- Battery Box: If using an external 12V battery, place it in a waterproof battery box. This protects the battery from splashes and provides a neat enclosure for the wiring. Secure the battery box in a dry, accessible area of your kayak, like inside a hull compartment or bungee-corded to the stern.
- Charging: Always fully charge your battery before each trip. For units with internal batteries, remember to bring the charging cable and adapter. If you're going on an extended trip, consider a solar charger for smaller units, or a spare charged battery pack.
Cable Management: Keeping Things Tidy and Safe
A mess of cables on a kayak is not just unsightly, it's a safety hazard and a recipe for snags.
- Secure All Cables: Use cable ties, Velcro straps, or marine-grade clips to neatly secure all power and transducer cables. Keep them snug against the kayak's hull or rigging points, minimizing any slack that could get caught on your paddle, fishing line, or feet.
- Avoid Pinch Points: Ensure cables aren't pinched by hatches, seat rails, or other moving parts. Over time, pinched cables can fray and lead to electrical problems. A well-organized setup means less distraction and more focus on what matters – catching fish! When you're retrieving a big walleye in the dark during night fishing, you definitely don't want to trip over a loose cable.
Choosing Your Perfect Companion
Ultimately, the "best" portable fish finder for kayak fishing in Alberta depends on your personal fishing style, the species you target, and your budget. Whether you're a seasoned angler chasing How to Catch Walleye in Alberta on our big lakes, or just starting out exploring local ponds, there's a portable unit out there that will enhance your experience. Take the time to consider the features we've discussed, read reviews, and maybe even visit a local shop like Bass Pro Shops to get a hands-on feel for different models. Remember, the goal is to spend more time fishing effectively and less time wondering what lies beneath.
Here's a quick comparison of typical portable fish finder features:
| Feature Category | Basic Portable Unit (Entry-Level) | Mid-Range Portable Unit (Good Value) | Advanced Portable Unit (High Performance) |
|---|---|---|---|
| Sonar Technology | Traditional 2D Sonar (narrow/wide beam) | CHIRP 2D Sonar + Down Imaging/ClearVü | High-Resolution CHIRP + Down/Side Imaging/360 Imaging |
| Display Size | 3.5 – 4.3 inches | 5 – 7 inches | 7 – 9 inches |
| Display Type | Color, lower resolution | Full color, good resolution, anti-glare | High-definition full color, excellent resolution, bright |
| Battery Life (Avg) | 4-6 hours (internal) | 6-10 hours (internal or external options) | 8-15+ hours (external battery often preferred for run time) |
| GPS/Mapping | Basic GPS (waypoints, speed, track) | Advanced GPS with base maps (option for detailed charts) | Detailed GPS mapping, chartplotter, custom mapping, Wi-Fi connectivity |
| Transducer Mount | Suction cup or simple clamp | Versatile arm mount, scupper mount compatible | Robust track mount compatible systems, dedicated kayak kits |
| Typical Use Case | Casual fishing, small ponds, river exploring | Serious weekend angler, structure fishing, larger lakes | Tournament angler, deepwater fishing, extensive mapping, diverse waters |
| Durability (IPX) | IPX4 – IPX6 (Splash-resistant) | IPX7 (Submersible for short periods) | IPX7 (Rugged, heavy-duty construction) |
Disclaimer
This article is for general informational purposes only and does not constitute professional advice. Laws, prices and regulations vary by location and change over time. Consult a qualified professional for guidance on your specific situation.