How to euro nymph the Bow River
Euro nymphing on the Bow River can seem like a daunting technique, a bit like trying to solve a complex puzzle while wading in a cold river. Many anglers struggle with traditional indicator nymphing in the Bow's diverse currents, missing subtle strikes or getting constantly snagged. This comprehensive guide will strip away the mystery, walking you through everything you need to know to master Euro nymphing and consistently hook into those legendary Bow River trout.
Understanding Euro Nymphing Fundamentals for Alberta Waters
Euro nymphing, often simply called "tight-line nymphing," isn't just another way to fish nymphs; it's a whole philosophy centered around direct contact and hyper-sensitive strike detection. For a river as rich and challenging as the Bow, it can be an absolute game-changer.
What Makes Euro Nymphing Different
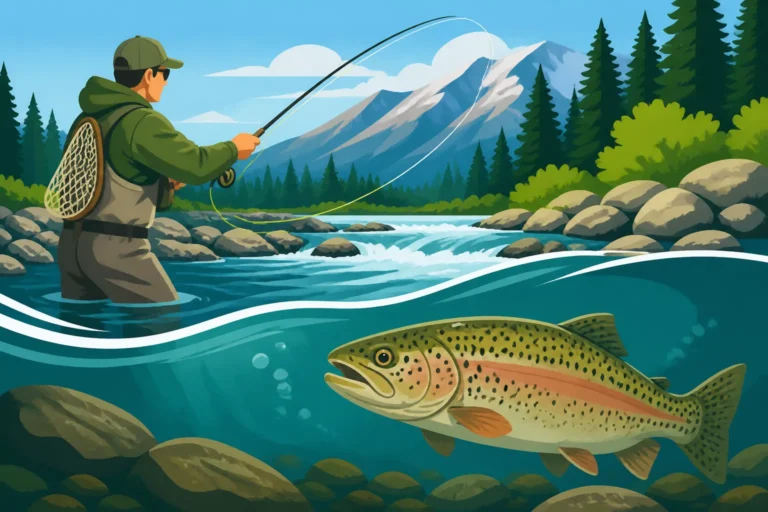
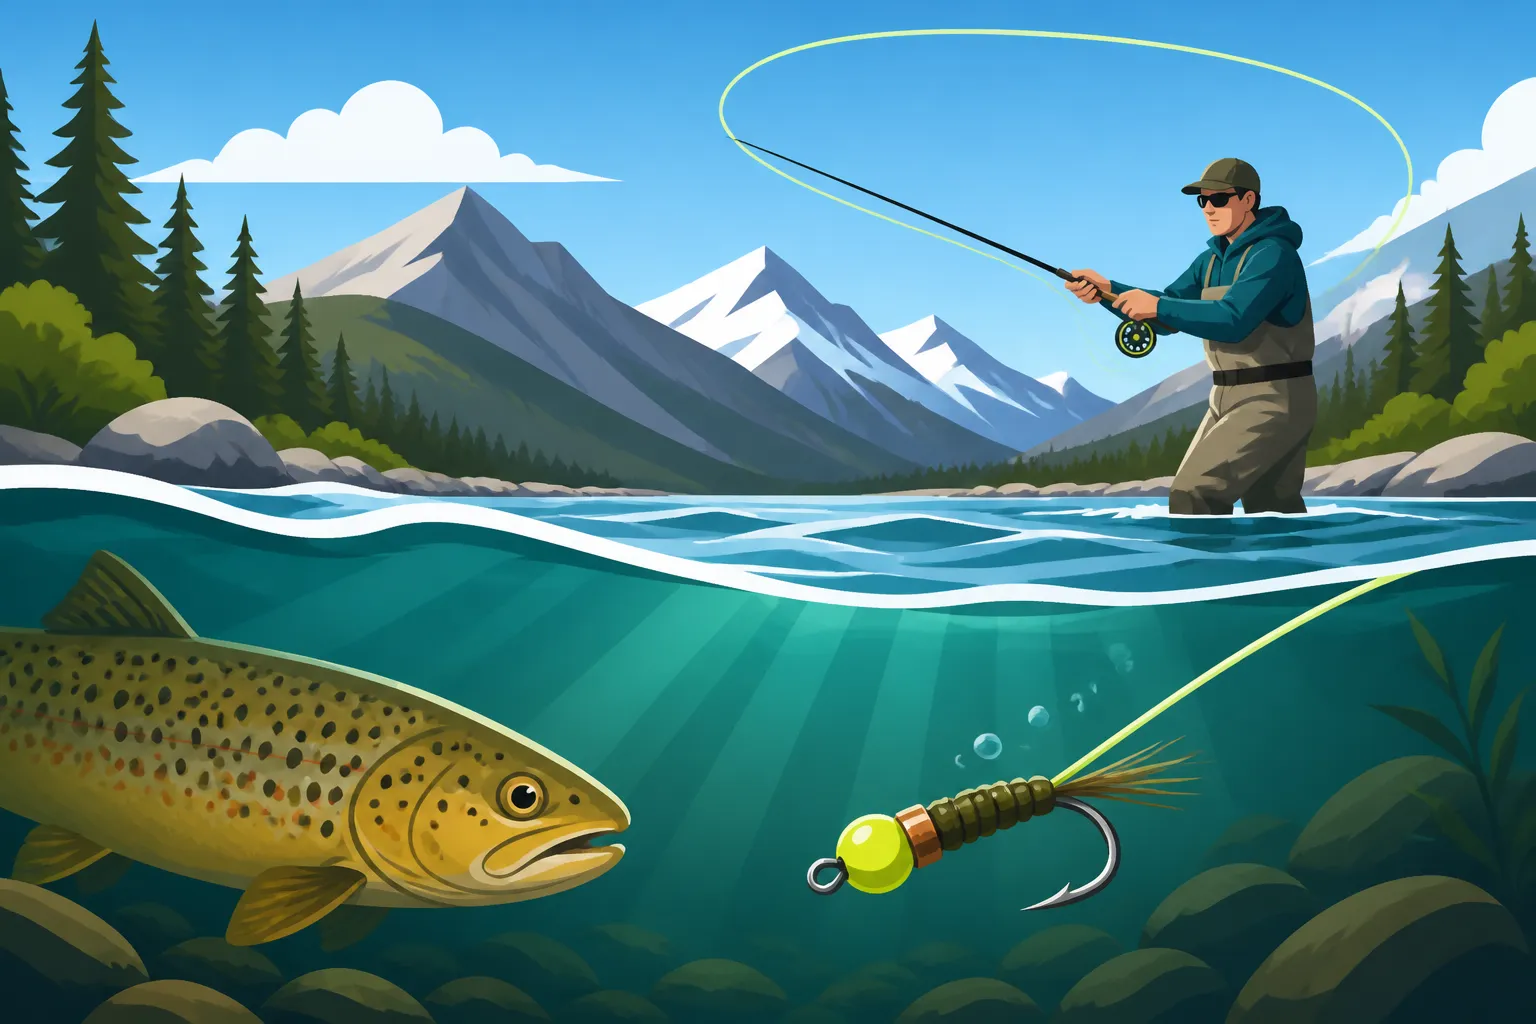
The core difference between Euro nymphing and traditional indicator nymphing is the complete absence of a floating strike indicator. Instead, you're relying on a long, sensitive rod, a specialized leader, and direct physical connection to your flies to detect the slightest hesitation or bump. Think of it less like watching a bobber and more like feeling the pulse of the river directly through your fingertips.
When you're Euro nymphing, your leader is designed to be largely submerged, creating a direct line to your flies. This minimizes drag in complex current seams, allowing your flies to sink quickly and drift naturally through the water column where trout are actively feeding. On the Bow River, where you often encounter diverse flows within a single run—fast currents on the surface, slower currents near the bottom—this ability to maintain a drag-free drift is paramount. A traditional indicator can often pull your flies unnaturally, especially in eddy lines or conflicting currents. With Euro nymphing, your rod tip becomes the primary 'indicator', hovering just above the water, allowing you to lead your flies through the current and react instantly. This heightened sensitivity means you'll detect those incredibly subtle takes that would go unnoticed with a floating indicator, often just a slight pause or a barely perceptible tic in your sighter.
Essential Gear for a Successful Euro Nymphing Setup
Having the right tools makes all the difference when it comes to Euro nymphing, especially on a robust river like the Bow. It's a specialized setup that prioritizes sensitivity and reach.
The absolute cornerstone of a Euro nymphing setup is a long, sensitive fly rod. We're talking typically 10 to 11 feet in length, usually in a 2 to 4 weight. This extra length isn't just for casting; it’s crucial for reach, line control, and cushioning delicate tippets. A fast or medium-fast action is preferred, offering the backbone to drive tungsten nymphs into the current and the sensitivity to telegraph subtle strikes. For the Bow, where you might be casting heavier rigs or battling larger fish, a 3 or 4-weight offers a good balance. The reel's primary purpose here is merely to balance the long rod and hold your line; a fancy drag system isn't as critical as with traditional fly fishing since you'll be fighting most fish on the rod itself, not the reel.
Next up is your fly line. Many Euro nymphing lines are incredibly thin and designed to reduce sag between your rod tip and the water, further enhancing sensitivity and direct contact. Some anglers even prefer to use a specialized "level line" or even just backing for the main portion of their reel to maximize this effect. This thin diameter cuts through the air and water more efficiently than a standard weight-forward line, which is especially helpful when trying to present flies in Alberta's frequently breezy conditions.
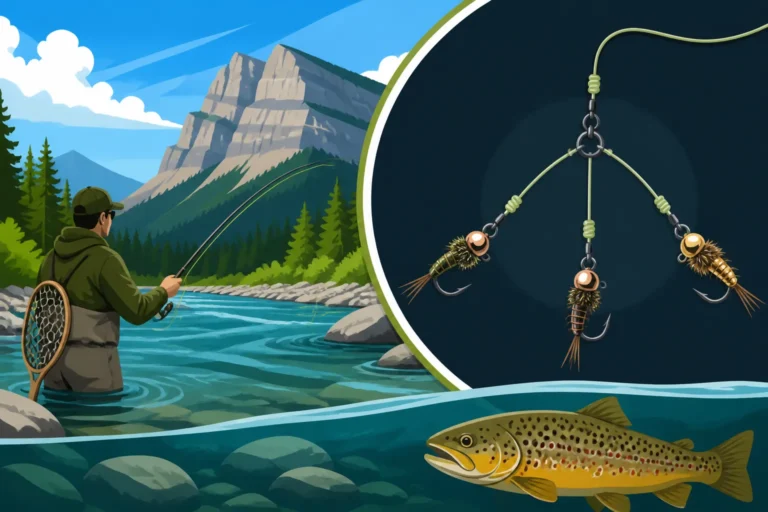
The leader system is where the magic really happens. It's typically a long, complex setup designed for stealth, weight transfer, and maximum strike detection. It starts with a butt section of monofilament or fluorocarbon, transitioning into a multi-colored "sighter" section—often bright fluorescent mono in two alternating colors like chartreuse and pink. This sighter acts as your visual indicator, showing you any subtle movements or pauses that indicate a strike. At the end of the sighter, a small tippet ring serves as a connection point to your fine tippet. The tippet itself is usually 5x to 7x fluorocarbon, chosen for its invisibility underwater, density (which helps the flies sink faster), and abrasion resistance against the Bow's rocky bottom. This entire system is incredibly light and allows for precise control of your nymphs, even in tricky currents.
Finally, you need the right flies. Euro nymphs are generally tied on jig hooks with tungsten beads, making them sink rapidly and ride hook-point-up, which significantly reduces snagging. Popular patterns for the Bow include various Perdigons (olive, black, brown), Frenchies (pheasant tail with a hot spot), Walts Worms, and Squirmy Worms. You'll want a range of weights and sizes to adapt to different water depths and current speeds. Remember, the deeper and faster the water, the heavier your nymph needs to be to reach the fish. A good practice is to carry an assortment of weighted nymphs to cover all conditions you might encounter on the Bow. You can find a great selection of specialty Euro nymphing gear, including dedicated rods, lines, and pre-tied flies, on platforms like Amazon, making it easier to build your ideal setup.
| Feature | Traditional Nymphing | Euro Nymphing |
|---|---|---|
| Strike Indicator | Floating indicator (bobber) | Sighter material on leader (visual & tactile) |
| Rod Length | Typically 8.5-9 feet | Typically 10-11 feet |
| Line Contact | Indirect (via indicator) | Direct (tight line to flies) |
| Primary Sense | Visual (indicator movement) | Tactile (feeling the strike) |
| Leader Setup | Shorter, simpler, often tapered | Longer, complex, specialized sighter |
| Fly Weight | Can be lighter (indicator provides depth) | Heavily weighted (tungsten beads) |
| Snagging Potential | Higher (flies drift point down) | Lower (jig hooks ride point up) |
| Drag Control | Challenging in complex currents | Excellent due to direct contact |
| Ideal Conditions | Mixed currents, shallower water | Technical water, variable depths, faster flows |
Crafting Your Perfect Euro Nymphing Leader for the Bow River
The leader is arguably the most critical component of a Euro nymphing setup. It's a finely tuned system designed to give you maximum feel and stealth. Understanding its construction is key to success on the Bow.
The Anatomy of a High-Performance Leader
A proper Euro nymphing leader is a meticulously constructed piece of equipment, vastly different from your standard tapered leaders. It’s built for sensitivity, drag reduction, and direct connection.
Typically, it starts with a butt section of strong, relatively thick monofilament or fluorocarbon, often 10-20 lb test, extending anywhere from 10 to 20 feet. This length helps create distance from your fly line, which is thicker and more prone to drag, allowing your flies to sink more naturally. Some anglers will build this butt section with a series of progressively lighter diameter mono, tapering it slightly, while others prefer a single, consistent diameter for simplicity. The main goal here is to create a lightweight, low-stretch connection that won't sag excessively.
Connected to this butt section is the sighter. This is the visual heart of your Euro nymphing setup and is absolutely essential for detecting strikes. Sighters are usually made of two-tone fluorescent monofilament, typically 2x-4x in diameter, with alternating colors like pink and chartreuse, or black and white. This bi-color design helps you see it against various backgrounds, whether it's bright sky, dark water, or green vegetation along the bank. The sighter section can range from 18 inches to several feet, depending on angler preference and water conditions. Longer sighters offer more visual cues but can be harder to cast in wind. You connect the sighter to the butt section with a strong, low-profile knot like a blood knot or triple surgeon's knot. The beauty of the sighter is that it not only shows you subtle hesitations but also helps you track your drift, ensuring your flies are moving at the correct speed through the Bow's current.
At the end of your sighter, you'll find a small tippet ring. These tiny, strong metal rings are crucial. They provide a robust, tangle-free connection point for your fine tippet while minimizing bulk and weight. The tippet ring also makes it easy to change tippet lengths or re-tie without shortening your valuable sighter section. From the tippet ring, you'll typically attach 2 to 6 feet of fine fluorocarbon tippet, usually 5x to 7x. Fluorocarbon is preferred because it's nearly invisible underwater, sinks faster than monofilament, and has excellent abrasion resistance, which is vital when fishing the rocky bottom of the Bow. The length of your tippet depends on water depth and clarity; longer tippets offer more stealth in clear, shallow water, while shorter tippets give you more direct contact and faster sink rates in deeper, faster runs. Mastering your leader construction means adapting these elements to the specific conditions you encounter. If you're looking for guidance on specific knots or leader formulas, resources like "Reading the Alberta Guide to Sportfishing Regulations" often include basic rigging diagrams or refer to excellent online tutorials.
Tying Proven Euro Nymphs for Bow River Trout
The right fly selection is always important, but with Euro nymphing, it's about more than just matching the hatch – it’s about weight, profile, and sometimes, a little flash. For the demanding trout of the Bow River, certain patterns have consistently proven their worth.
When it comes to Euro nymphs for the Bow, you're generally looking for patterns that get down quickly and stay down. This means heavy tungsten beads are your best friend. Jig hooks are also essential, as they allow the fly to ride hook-point-up, reducing snags on the Bow's abundant rocks and debris, and improving hook-sets.
One of the most effective patterns is the Perdigon nymph. Originating from Spain, these sleek, resin-coated nymphs sink like a stone. Common colors for the Bow include olive, black, brown, and sometimes purple, often with a "hot spot" of fluorescent thread (orange, pink, or chartreuse) near the bead or tail. Their slim profile allows them to cut through the water column with minimal resistance, making them ideal for getting to depth quickly in the Bow's swift currents. Sizes typically range from #14 to #18.
Another absolute staple is the Frenchie, a variation of the classic pheasant tail nymph. Tied with a tungsten bead, a pheasant tail body, and often a bright hot spot collar (orange or pink are popular), the Frenchie imitates a wide variety of aquatic insects. Its slightly bulkier profile compared to a Perdigon can offer a different enticing look. For a detailed look at fly patterns that excel on this particular waterway, you might want to check out "Fly Patterns for the Bow River".
The Walts Worm is a deceptively simple, yet incredibly effective pattern. Essentially a tungsten-bead version of a caddis larva, it's tied with just a shaggy dubbing body. Its natural, buggy appearance and quick sink rate make it a killer when trout are keying on caddis. Varying the dubbing color from olive to brown to natural grey will cover most situations. For a true 'buggy' look, the Squirmy Worm (though sometimes controversial among purists) can be devastating, especially in higher or off-color water. Its wriggling action and bright color (red, pink, worm brown) can trigger aggressive strikes.
Beyond specific patterns, consider varying the weight of your nymphs. You'll want a range of tungsten bead sizes (2.5mm, 3.0mm, 3.5mm, 4.0mm) for each pattern. In deeper, faster runs, or when probing pockets, a 3.5mm or 4.0mm bead might be necessary to get your flies down. In shallower riffles or slower pools, a 2.5mm or 3.0mm might be perfect. Often, you'll fish a two-fly rig: a heavier "point" fly (the bottom fly) to get the rig down, and a lighter "dropper" fly (tied off a tag from the point fly's hook bend) to fish higher in the water column. You can generally tie your own, or if you're in a pinch, many online retailers like Amazon offer decent pre-tied selections to get you started.
Mastering the Drift and Strike Detection on the Bow
Euro nymphing is a very active fishing technique, requiring constant engagement and a keen sense of observation. Getting your flies in the right zone and knowing when to set the hook are skills that truly unlock the Bow's potential.
Reading the Water for Optimal Nymphing Opportunities
Before you even make your first cast, you need to become a master at reading the water. The Bow River is a complex ecosystem with diverse holding lies for trout, and Euro nymphing excels at targeting these specific zones.
Trout, especially large ones, are rarely in the fastest, most turbulent water unless they are actively migrating or spawning. Instead, they seek out holding lies where they can expend minimal energy while still having easy access to passing food. Look for seams where faster and slower currents meet – these are prime feeding lanes. Riffles and runs, particularly those with a broken surface, are also excellent, as the turbulent water provides cover and dislodges insects from the riverbed. Pocket water, often found in freestone sections or where large rocks create mini-eddies and slack water, is another fantastic target for Euro nymphing. These small pockets provide trout with shelter from strong currents and a conveyor belt of food.
When approaching a spot, always think stealth. Trout in the Bow are incredibly wary. Approach from downstream or across the current, and move slowly and deliberately. If you can see the fish, they can probably see you. Minimizing your silhouette against the skyline is also important. As you get closer, take a moment to observe the current speed and estimate the depth. This information is crucial for selecting the right weight of nymphs. If you’re fishing a deep, fast run, you’ll need heavier tungsten beads to penetrate the current and get your flies to the bottom quickly. For shallower riffles, lighter flies might be more appropriate to avoid snagging and maintain a natural drift. The ability to quickly assess depth and current speed and then adjust your fly selection accordingly is a hallmark of a skilled Euro nympher. Knowing specific areas, like those described in a detailed "Bow River Fishing Guide", can also give you a significant advantage.
The Art of the Controlled Drift and Sensitive Strike Detection
The essence of Euro nymphing lies in maintaining a perfectly controlled, drag-free drift while staying in direct contact with your flies. This "touch" system is what allows you to detect the most subtle takes.
Your rod position is paramount. Hold your rod high, often at a 45-degree angle or even higher, pointing the tip slightly upstream of your flies. This high-sticking technique keeps your fly line off the water, minimizing drag and maximizing your direct connection. As your flies drift downstream, you'll "lead" them with your rod tip, moving it at the same speed as the current, allowing the flies to tumble naturally. The goal is to keep just a tiny bit of tension in your leader, enough to feel the flies but not so much that you're pulling them unnaturally. Think of it as a delicate dance between your rod tip and the current. Many anglers find using a "Best Wading Staff for Fast Current" can help maintain balance and precise rod control in the Bow's stronger flows.
Line management is equally critical. You want to minimize any slack between your rod tip and your sighter, and definitely between your sighter and your flies. Any slack will kill your sensitivity and delay your strike detection. As your flies drift, you'll be constantly adjusting your rod tip, stripping in tiny amounts of line if necessary to maintain that direct connection.
The "touch" system is where the true sensitivity of Euro nymphing comes into play. With a properly weighted rig and direct contact, you'll actually feel your flies ticking along the bottom, bumping into rocks or rolling along the substrate. Any deviation from this normal "feel" — a sudden stop, a heavy weight, or a subtle tap — could be a fish. These are the tactile cues you’re training yourself to recognize.
In addition to feel, your sighter provides crucial visual cues. Any slight dip, twitch, stop, or even an upstream movement of your sighter is a signal to set the hook. Sometimes, a fish will simply inhale the fly and continue drifting, causing your sighter to subtly pause. Other times, it might move sideways or even slightly upstream. Trust your instincts; if anything looks or feels "off," set the hook.
The hook set itself should be swift, short, and positive. A quick flick of the wrist, usually upwards or slightly to the side, is all that’s needed. Don't go for a big, sweeping trout set like you might with a dry fly. Because you have direct contact, even a small movement is enough to sink a sharp jig hook. Once a fish is on, you'll feel the weight of it, and your rod will immediately bend into the fight. Using a "Best Landing Net for Trout" with rubberized mesh is highly recommended for safe, efficient catch and release, which is particularly important on a renowned wild trout fishery like the Bow River.
Advanced Euro Nymphing Tactics and Considerations
Once you've got the basics down, you can start finessing your Euro nymphing approach to tackle more challenging scenarios on the Bow and ensure you're fishing responsibly.
Dealing with Different Water Conditions and Flows
The Bow River can change its personality with the seasons and even after a heavy rain. Adapting your Euro nymphing tactics to these conditions is what separates a good angler from a great one.
When the Bow is running high or off-color, perhaps due to spring runoff or heavy rains, visibility is reduced, and currents are often stronger. In these conditions, trout tend to move out of the main current and into slower, more predictable seams along the banks or behind large obstructions. This is when you'll want to use heavier flies (3.5mm-4.0mm tungsten beads) to ensure they get to the bottom quickly. Focus your efforts on those slower seams, eddy lines, and soft pockets closer to the shore. A common tactic is to fish two heavy flies to really punch through the water column. The lack of visual cues in murky water makes the tactile feedback of Euro nymphing even more critical. You might also experiment with patterns that incorporate brighter "hot spot" colors or flash to attract attention.
Conversely, when the water is low and clear – a common scenario during late summer or fall on the Bow – trout become incredibly spooky. This demands a much stealthier approach. You’ll want to use longer, finer tippets, often stretching to 6x or 7x, to present your flies as naturally as possible. Smaller flies (#16s and #18s) are usually more effective in these conditions, mimicking the natural invertebrates trout are feeding on. Your casting and wading techniques need to be impeccable to avoid spooking fish. This is where your "Best Waders for Alberta Trout Rivers" and "Best Wading Boots for Rocky Rivers" really come into their own, allowing you silent and sure footing. Approach spots from downstream, stay low, and minimize false casts. Long, precise drifts are key to getting a take from a wary Bow River brown trout in crystal clear water. Regularly checking the "Best Time of Year to Fish in Alberta" data for optimal conditions can also provide a strategic advantage.
Windy conditions, unfortunately, are a frequent reality in Alberta. Wind can make Euro nymphing challenging by creating sag in your leader and making it difficult to maintain direct contact. To counteract this, try to fish with the wind at your back, if possible, to aid in casting and leader control. If the wind is blowing across the river, adjust your casting angle to minimize the leader's exposure to the wind. Sometimes, a slightly heavier overall rig can help punch through the wind better, keeping your leader tighter.
Ethical Angling and Conservation for the Bow River
Fishing the Bow River is a privilege, and with that comes a responsibility to protect this incredible resource. Ethical angling practices are not just good manners; they are essential for the long-term health of the fishery.
One of the most critical practices on the Bow, especially in its renowned trout sections, is the use of barbless hooks. Many stretches of the Bow River are designated "catch and release only" or have specific regulations regarding barb-less hooks, as outlined in the "Alberta Fishing Regulations Explained". Even where not explicitly mandated, using barbless hooks significantly reduces harm to fish, making release easier and minimizing tissue damage. You can easily pinch down the barbs on most hooks with a pair of pliers.
Proper fish handling is another paramount concern. When you hook a fish, especially the larger, powerful trout of the Bow, aim to land it as quickly as possible to minimize its stress. Keep the fish in the water as much as possible, using a rubber-meshed net (like a "Best Landing Net for Trout") to scoop it. Avoid dragging fish onto the bank or squeezing them. If you want a photo, get your camera ready before you lift the fish, hold it gently with wet hands, and support its weight horizontally. Get the shot quickly and release it immediately. For guidance on specific regulations, refer to the "Alberta Fishing License Guide for 2026", and be sure to understand the rules for "Alberta Catch and Release Only Waters". Our collective commitment to these practices ensures that the Bow River continues to be a world-class trout fishery for generations to come.
Disclaimer
The information provided in this guide is for general informational purposes only. Fishing regulations, seasons, and licensing requirements can change. Always consult the most current Alberta Guide to Sportfishing Regulations and obtain the necessary licenses before heading out to fish. Adhere to all local laws and regulations for safe and responsible angling.