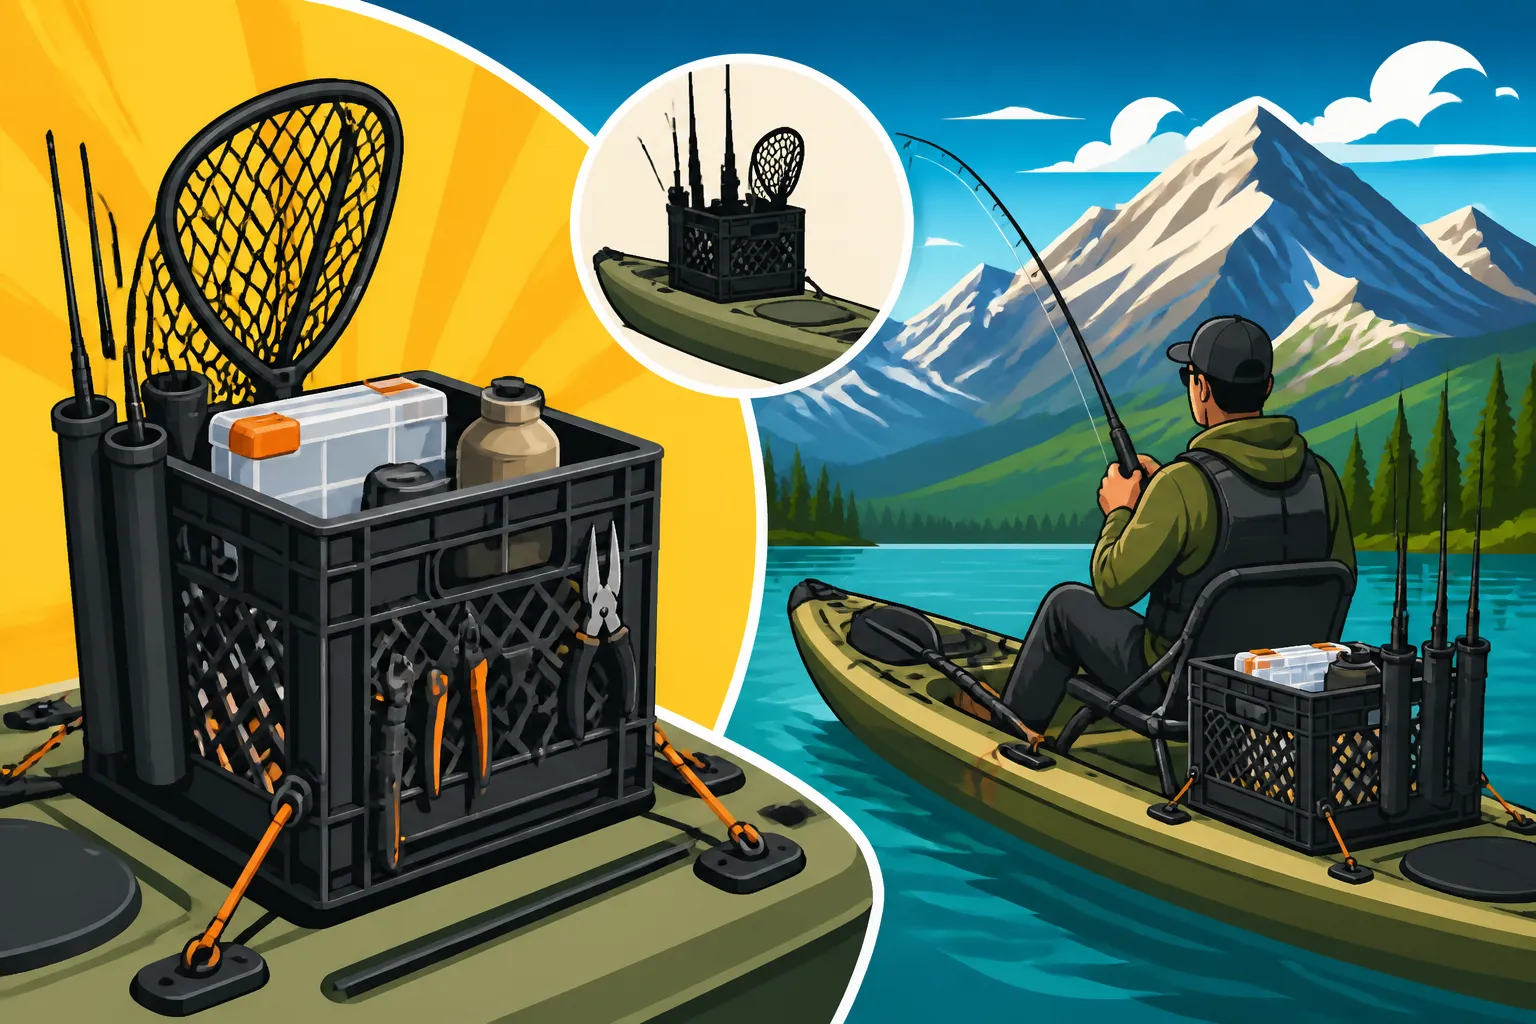
Best crate setup for kayak fishing storage
Oh, the joy of a perfect day on an Alberta lake or river, kayak gliding smoothly, sun on your face… interrupted by that frantic scramble for a specific lure, a pair of pliers, or a snack, only to find everything tangled or lost in the abyss of your kayak's hull. It's a common frustration for kayak anglers, and it can quickly turn a peaceful outing into a frustrating mess. This guide is all about banishing that chaos by helping you design the ultimate, organized fishing crate setup for your kayak, ensuring every piece of gear has its place and is always within easy reach.
Why a Fishing Crate is Essential for Kayak Anglers
Kayak fishing, while incredibly rewarding and intimate, presents a unique challenge: limited space. Unlike a big bass boat, you're working with a compact, often narrow platform where every inch counts. This is precisely why a well-thought-out fishing crate isn't just a convenience; it's a game-changer that transforms your kayak into a highly functional fishing machine. It’s about more than just holding stuff; it’s about making your fishing experience smoother, safer, and ultimately, more enjoyable.
Taming the Chaos on the Water
Imagine this: you've hooked into a feisty Northern Pike on an Alberta lake, and it's putting up a good fight. The last thing you want is to be fumbling around for your Boga Grip or pliers, risking losing the fish or, worse, getting a treble hook embedded in your finger because your tools are buried under a pile of gear. A fishing crate brings order to this potential chaos. By providing dedicated spots for your rods, tackle boxes, and essential tools, it eliminates the need to dig through hatches or awkwardly reach behind you. Everything you need for a quick re-tie, a fish landing, or a snack break is right there, neatly organized and accessible. This kind of organization isn't just about efficiency; it's a huge boost to safety, especially when you're dealing with sharp hooks, toothy fish, and slippery conditions.
Maximizing Limited Space
Kayaks, even the best fishing models, have inherent limitations when it comes to storage. While internal hatches are great for dry bags and extra layers, they aren't ideal for quick-access items. The beauty of a fishing crate lies in its ability to utilize vertical space efficiently, often fitting snugly into the tankwell area behind the seat. This area, often underutilized, becomes prime real estate for your most frequently used fishing items. Think about it: instead of having multiple tackle boxes scattered, or rods lying haphazardly, a crate consolidates everything into a single, manageable unit. Many crates come with, or can be easily modified to include, vertical rod holders, allowing you to carry multiple rigged rods securely without them interfering with your paddling or casting. This means you can easily switch between setups, whether you're trolling for walleye or casting a topwater for pike, without the hassle of unrigging and re-rigging. It truly helps make the most of every precious square inch of your Best Kayaks for Alberta Fishing.
Protecting Your Gear
Alberta's weather can be unpredictable, and fishing gear, especially electronics and delicate tackle, needs protection. A well-designed crate setup can incorporate various elements to keep your valuables safe from splashes, rain, and even accidental dips. Many anglers choose waterproof dry bags or small hard cases that fit inside their crates for phones, keys, and wallets. For tackle, dedicated tackle trays with secure latches keep lures from scattering and hooks from rusting. Furthermore, a sturdy crate prevents your rods from getting stepped on or tangled while launching or landing your kayak. It also keeps your gear elevated off the wet bottom of the kayak, minimizing exposure to standing water and grime. Investing a little time in a good crate setup is an investment in the longevity and functionality of your valuable fishing equipment.
Components of an Effective Kayak Fishing Crate Setup
Building the perfect kayak fishing crate isn't just about grabbing any old milk crate and tossing it in. It's about selecting the right core components and then customizing them to fit your specific needs and fishing style. Think of it as building a miniature mobile command center, tailored exactly to how you fish the waters of Alberta.
The Foundation: Choosing Your Crate
The most common starting point for a kayak fishing crate is, unsurprisingly, a standard plastic milk crate. These are incredibly versatile, readily available, and affordable. Their open design makes them easy to customize with zip ties, screws, and adhesives. However, there's also a growing market for purpose-built fishing crates from brands like YakAttack or Wilderness Systems. These often come with integrated features like molded rod holders, accessory tracks, and more robust construction.
When deciding, consider a few factors:
- Material: Standard milk crates are typically polyethylene, durable but can become brittle in extreme cold. Purpose-built crates might use higher-grade plastics designed for marine environments.
- Size: Measure the tankwell of your kayak! A crate that's too wide or too tall will be a pain. You want something that fits snugly but allows for easy access. If you're using a smaller recreational kayak, a compact crate might be better. For larger fishing kayaks like those popular on Lesser Slave Lake, you might accommodate a larger, more feature-rich model.
- Open vs. Closed Top: Most crates are open-top, allowing quick access. Some specialized crates have hinged lids, which offer better protection from elements but slightly slower access.
For many, a sturdy milk crate purchased from a big box store or even a general retailer like Amazon is the perfect starting point due to its cost-effectiveness and customization potential.
Essential Internal Organizers
Once you have your core crate, the magic truly happens with internal organization. This is where you prevent the "black hole" effect where small items vanish.
- Tackle Trays: The backbone of any fishing organization. Standard Plano-style trays fit perfectly into most milk crates, allowing you to categorize lures, weights, hooks, and soft plastics. Many anglers use one tray for topwater, another for jigs, another for cranks – keeping species-specific tackle ready, whether it's for trout on the Bow River or pike on Keho Lake.
- Rod Holders: Crucial for carrying extra rigged rods safely. You can buy clip-on or bolt-on rod holders that attach directly to the sides of your crate. PVC pipe sections, secured with zip ties or screws, are a popular DIY solution. Ensure they are tall enough to support the rods securely and angled slightly outwards to prevent tangles.
- Tool Holders: Pliers, line cutters, and forceps need to be immediately accessible. Velcro straps, magnetic strips, or small mesh bags secured to the inside or outside of the crate keep these tools from getting lost at the bottom.
- Dry Bags/Containers: For items you absolutely cannot get wet, like your car keys, wallet, phone, or even a small first-aid kit. A small, roll-top dry bag or a waterproof hard case fits nicely inside the crate, offering peace of mind. You can find these at any outdoor store, including Bass Pro Shops.
- Miscellaneous Bins/Pouches: Small plastic bins or mesh pouches are great for storing soft plastics in their original bags, extra leader material, sunscreen, or bug spray.
A well-organized crate means less time searching and more time fishing. If you're looking for ideas, check out articles on Best Tackle Box Setup for Alberta Anglers to see how others organize their general tackle, which can easily be adapted to a crate system.
External Add-ons and Customizations
The exterior of your crate offers even more opportunities for personalization and functionality.
- Bungee Cords/Straps: Essential for securing items to the crate, like a small cutting board, a compact net, or even a collapsible anchor. They also act as a failsafe to keep the crate's contents from spilling if you flip your kayak.
- Accessory Tracks: If you have a purpose-built crate or are handy with DIY, adding short gear tracks (like those from YakAttack or Scotty) to the top edges allows you to quickly attach and remove various accessories without drilling into the crate each time.
- Safety Flag/Light Pole: For visibility, especially when fishing larger lakes or in low light conditions. A pole that inserts into one of your rod holders, topped with a bright flag or an all-around white light, significantly enhances safety.
- Camera Mounts: Many anglers like to document their catches. A small camera mount can be rigged to the crate, giving you a stable platform for filming.
- Cup Holders: A simple luxury, but being able to securely hold your coffee or water bottle can make a big difference on a long day of paddling.
These external additions allow you to keep frequently used items like a Best Landing Net for Trout or Best Landing Net for Pike readily available without taking up precious internal space.
Building Your Custom Alberta Kayak Fishing Crate
Now that we've gone through the components, let's talk about putting it all together. This isn't just about assembly; it's about thinking strategically about your fishing habits and the specific waters you fish in Alberta.
Step-by-Step Crate Assembly
Whether you're starting with a simple milk crate or a more advanced model, the assembly process is similar.
- Plan Your Layout: Before drilling or cutting, place all your intended items around and inside the crate. Where do you want your rod holders? Which side is easiest to reach your pliers? Will your tackle trays fit vertically or horizontally? This planning phase is crucial. For instance, if you often fish for walleye, you'll want easy access to your Best Tackle for Alberta Walleye.
- Attach Rod Holders: This is often the first step. If using PVC, cut it to length (usually 18-24 inches) and angle the bottom for drainage. Secure PVC or purchased rod holders to the outside of the crate using heavy-duty zip ties, bolts, or hose clamps. Make sure they are sturdy – a rod going overboard is never fun. Consider mounting them slightly angled outwards to give your reels more clearance.
- Install Internal Organizers: If using modular tackle trays, ensure they fit well. You might add small bungee cords or straps inside the crate to hold them in place during transport. For smaller items, consider clear plastic containers or mesh bags attached to the crate walls. Some anglers even glue a piece of EVA foam to the bottom to silence rattling and provide a bit of cushioning.
- Add External Features: Attach any accessory tracks, bungee cords, or tool holders to the exterior. For tools, consider a designated spot for your pliers or scissors that's easy to grab with one hand while managing a fish. Many anglers use self-tapping screws for plastic, but make sure they're marine-grade stainless steel to prevent rust.
- Test It Out: Load your crate with all your gear and place it in your kayak (ideally, on dry land first!). Sit in your kayak and reach for everything. Can you easily access your leader, a different lure, or your phone? Adjust as needed. Remember, what looks good on the workbench might not feel right on the water.
This hands-on approach ensures your crate is truly optimized for your angling style. Don't be afraid to experiment; you can always reconfigure elements later.
Tailoring Your Setup for Specific Fishing Trips
One of the greatest advantages of a custom crate is its adaptability. You can easily swap out tackle trays or internal components to suit the species you're targeting or the type of water you'll be fishing.
- Walleye vs. Trout: If you're heading to Lesser Slave Lake for walleye, your crate might be loaded with crankbaits, jigging spoons, and a few minnow-imitating soft plastics. You'd likely have a specific tray for your walleye jigs. If you're off to the Bow River for trout, your setup might include a fly box, extra tippet, strike indicators, and maybe a small box of inline spinners or spoons if you're not strictly fly fishing. Fly Fishing for Trout on the Bow River requires different gear than bottom-bouncing for walleye.
- Short Trips vs. Full-Day Excursions: For a quick evening paddle, you might only need a minimalist crate with a couple of rods, a small tackle box, and a water bottle. For a full-day adventure, you'd pack more: snacks, extra layers (in a dry bag), a multi-tool, sunscreen, and possibly even a small stove for a shore lunch. The beauty is you can prepare different "inserts" or load-outs for your crate, making switching gear quick and easy.
- Different Fishing Styles: Are you primarily casting, trolling, or still fishing? Your crate can be configured to support these techniques. For trollers, extra line, leader material, and maybe a small portable fish finder battery stored securely can be integrated. For still fishing, bait containers and extra weights would be prominent.
The goal is to have a dynamic system that evolves with your fishing plans, making your experience more efficient and productive.
Securing Your Crate to the Kayak
This is a critical safety consideration that often gets overlooked. An unsecured crate can become a dangerous projectile in rough water, a flipping incident, or even just during transport.
- Bungee Cords with Hooks: The most common method. Loop bungee cords through the handles or base of your crate and clip them onto your kayak's deck loops or grab lines in the tankwell. Use at least two, preferably crossing them for maximum stability.
- Cam Straps: More secure than bungees as they don't stretch. Cam straps are excellent for tightly cinching the crate down, preventing any movement. They are particularly useful if your tankwell is a bit larger than your crate, allowing you to really snug it in.
- "T" Handle Clips: Some kayaks have scupper holes that are designed to accept "T" handles from various accessories. You can often thread these through the crate and secure it directly to the scupper holes, providing a very solid anchor point.
- Integrated Systems: Some purpose-built kayaks and crates offer integrated locking systems or tracks that allow you to securely mount the crate without the need for external straps.
Always double-check your connections before launching. A few seconds spent ensuring your crate is secure can prevent a whole lot of hassle (and lost gear!) out on the water. This is as important as adhering to Alberta Boating Laws for Anglers and ensuring you have Life Jacket Requirements for Alberta Boaters met.
Beyond the Basics: Advanced Crate Considerations
For the serious kayak angler, a fishing crate can be more than just storage; it can be an integral part of their electronic setup and overall comfort on the water. These advanced considerations can elevate your kayak fishing experience, especially for those long days chasing fish across big Alberta lakes.
Power and Electronics Integration
Modern kayak fishing often involves electronics – fish finders, GPS units, action cameras, and even phone chargers. Integrating a power source and managing cables can be a challenge in a small kayak, but your fishing crate can be the perfect solution.
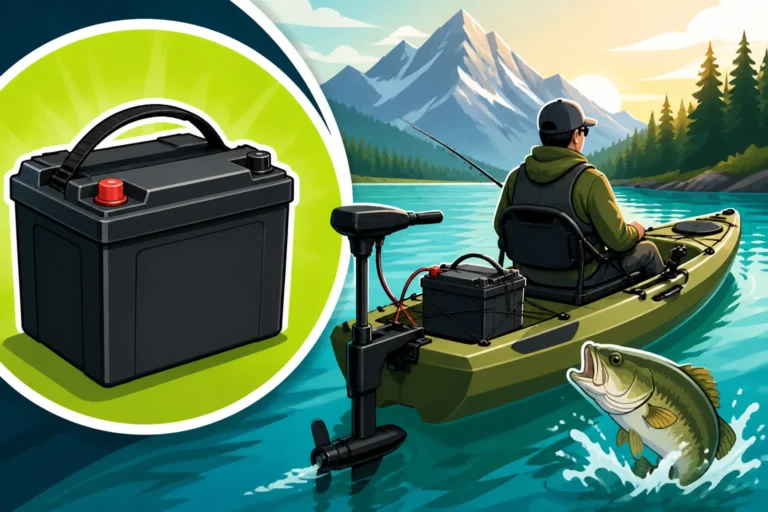
- Battery Storage: A small, sealed lead-acid or lithium battery can be stored securely within the crate, often in a waterproof battery box. This keeps it dry, protected, and easily accessible for charging. Ensure the battery box is well-ventilated if it's not fully sealed.
- Fish Finder Mounts: Many anglers use a short arm or a dedicated mount that attaches directly to the crate, positioning their fish finder display perfectly in view. The transducer cable can then be routed neatly along the side of the kayak to the stern, connected to the battery in the crate. This keeps the valuable electronics unit and its power source together and easily removable for transport. If you're looking for guidance on choosing the right electronics, our guide on Best Fish Finders for Alberta Lakes offers some great insights that can be applied to a crate setup.
- Wiring Management: Use cable ties or conduit to keep all wiring neat and secure, preventing snags and damage. Route cables inside the crate or along its exterior in a way that doesn't interfere with your paddling or casting. A clean wiring setup is not just about aesthetics; it's about reliability and preventing accidental disconnections in critical moments.
By centralizing your power and electronics within or around your crate, you create a cleaner, more efficient cockpit that's less prone to snags and tangles, allowing you to focus on the fishing.
Ergonomics and Accessibility
The placement and design of your crate greatly impact your comfort and efficiency. It's not just about fitting it in; it's about making it work for you.
- Crate Placement: Most anglers place their crate in the tankwell directly behind their seat. This allows for easy reach-back access to frequently used items. However, depending on your kayak design and personal preference, you might adjust its position slightly forward or back. Some larger kayaks even have space for a smaller crate in front of the seat, though this is less common for primary storage.
- Frequently Used Items: Think about what you grab most often – your pliers, line cutter, a favorite lure, your water bottle. These should be placed on the outer edges or top of your crate, or in specific easy-access pockets, rather than buried deep inside. This reduces the amount of twisting and reaching, saving energy throughout the day.
- Casting and Paddling Clearance: Ensure your crate setup doesn't impede your paddle stroke or casting motion. Rod holders should be positioned so that the rod tips are clear of your head and arms, and the crate itself shouldn't push against your back or restrict leg movement. This is especially important if you're considering a Best Kayak for River Fishing in Alberta, where quick maneuvers are often necessary.
- Seated vs. Standing: If you primarily fish from a seated position, your crate needs to be organized for seated access. If you frequently stand up to fish in your kayak, ensure the crate doesn't become a tripping hazard and that items are still accessible from a standing posture.
A well-thought-out ergonomic setup reduces fatigue and keeps you focused on the fishing, not on wrestling with your gear.
Maintenance and Longevity
Your fishing crate, like all your gear, will last longer and perform better with a little care. Alberta's diverse conditions, from scorching summer days to icy winter outings, can take a toll.
- Regular Cleaning: After each trip, especially saltwater outings (though less common in landlocked Alberta, it's good practice for any brackish water), rinse your crate thoroughly with fresh water. Remove any accumulated dirt, sand, fish slime, or spilled bait. A quick wash prevents corrosion on metal components and keeps your gear looking good.
- Sun Protection: UV rays are harsh on plastics, causing them to become brittle and discolored over time. Store your crate out of direct sunlight when not in use. If your crate sees a lot of sun, consider occasionally applying a UV protectant spray designed for plastics.
- Checking Fasteners: Regularly inspect all bolts, screws, zip ties, and bungee cords. Vibrations from transport and use can loosen fasteners, leading to parts falling off or becoming unstable. Replace any worn-out bungees or zip ties before they fail. Pay particular attention to your rod holders; a loose rod holder could mean a lost rod.
- Winter Storage: If you're an ice angler or simply put your kayak away for the colder months, ensure your crate is completely dry before storing it to prevent mildew and unwanted odors. Detach electronics, remove batteries, and store them indoors in a controlled environment.
A little preventative maintenance goes a long way in ensuring your custom crate setup provides years of reliable service on the beautiful waters of Alberta.
| Feature | DIY Milk Crate Setup | Purpose-Built Fishing Crate (e.g., YakAttack, Wilderness Systems) |
|---|---|---|
| Cost | Very Low (crate itself is inexpensive) | Moderate to High (can be a significant investment) |
| Customization | Extremely High (drill, cut, zip-tie anything) | High (often comes with tracks/molding for add-ons) |
| Durability | Good (standard plastic, can become brittle in cold) | Excellent (often marine-grade plastics, reinforced) |
| Integrated Features | None (all add-ons are DIY) | Often includes rod holders, accessory tracks, unique shapes |
| Aesthetics | Functional, can look DIY (depending on effort) | Sleek, professional, designed to integrate with kayak |
| Weight | Generally Lighter | Can be heavier due to thicker materials/integrated features |
| Ease of Setup | Requires more time and effort for modifications | Quicker to set up, but might require specific brand accessories |
| Security | Relies on external straps/bungees | May have integrated locking mechanisms or dedicated attachment points |
A well-organized fishing crate setup is more than just a convenience; it’s an absolute necessity for any serious kayak angler venturing out onto Alberta’s diverse waters. From the tranquil trout streams to the vast walleye lakes, having your gear neatly stored, easily accessible, and safely secured makes all the difference between a frustrating day and a truly successful, enjoyable fishing adventure. So, take the time to plan, build, and refine your perfect crate. You’ll be glad you did when that trophy fish hits, and everything you need is right at your fingertips.
Disclaimer
This article is for general informational purposes only and does not constitute professional advice. Laws, prices and regulations vary by location and change over time. Consult a qualified professional for guidance on your specific situation.