Best sonar settings for finding structure on Cold Lake
Staring at your fish finder display on a vast expanse like Cold Lake and seeing nothing but a jumble of colours or, worse, a completely blank screen, can be incredibly frustrating. It feels like you're missing out on all the underwater secrets this incredible lake holds. This guide is here to demystify those intimidating sonar settings, helping you calibrate your unit to effectively find the humps, drop-offs, and rocky structures where Cold Lake's prized lake trout and walleye love to hide.
The Foundation: Knowing Your Fish Finder and Cold Lake's Waters
Before we even touch a setting, it’s crucial to understand the tools at your disposal and the environment you’re fishing in. Cold Lake is a significant body of water, known for its incredible depth and diverse underwater terrain, making precise sonar usage paramount for success. You wouldn’t try to paint a masterpiece without understanding your brushes and paints, and fishing with sonar is no different.
Transducer Placement and Frequency Choices
Your transducer is the "eye" of your fish finder, sending out sound waves and listening for their return. Its placement is absolutely critical, as a poorly placed transducer will give you garbage readings no matter how much you tweak your settings. For Cold Lake, where you might be running at higher speeds to cover ground for lake trout, ensuring your transducer is in "clean water"—free from prop wash or hull interference—is non-negotiable.
When it comes to frequencies, most modern fish finders offer a few options. Lower frequencies, like 50 kHz, penetrate deeper water and give you a broader cone angle, which is fantastic for scanning large areas for deep structure on Cold Lake. Think of it like a wide-angle lens on a camera; you get a bigger picture, but less detail. Higher frequencies, such as 200 kHz or even CHIRP (Compressed High-Intensity Radiated Pulse) systems, provide much finer detail and target separation. This is your zoom lens, perfect for identifying individual rocks on a hump or spotting a subtle depth change on a drop-off. For the sheer depth of Cold Lake, many anglers will run a dual-frequency or CHIRP system, using the lower frequency for overall depth and scanning, and switching to or layering with a higher frequency for pinpointing specific structures once they've identified a promising area. This combination approach allows you to efficiently scout vast areas and then zoom in with precision, especially when targeting those elusive lake trout suspended over deep structure. You can often find a wide variety of transducers and compatible fish finder units on Amazon, often with detailed specifications to help you choose the right one for your boat and fishing style on a lake like Cold Lake.
Understanding Cold Lake's Depths and Bottom Composition
Cold Lake is, as its name suggests, cold and deep. Depths can plummet well over 100 meters in places. This deep-water environment means your sonar needs to work harder to send and receive signals, and certain settings become even more critical. The bottom composition also varies from rocky reefs and sheer drop-offs to softer, silty areas. Knowing what type of bottom you're over helps you interpret your screen.
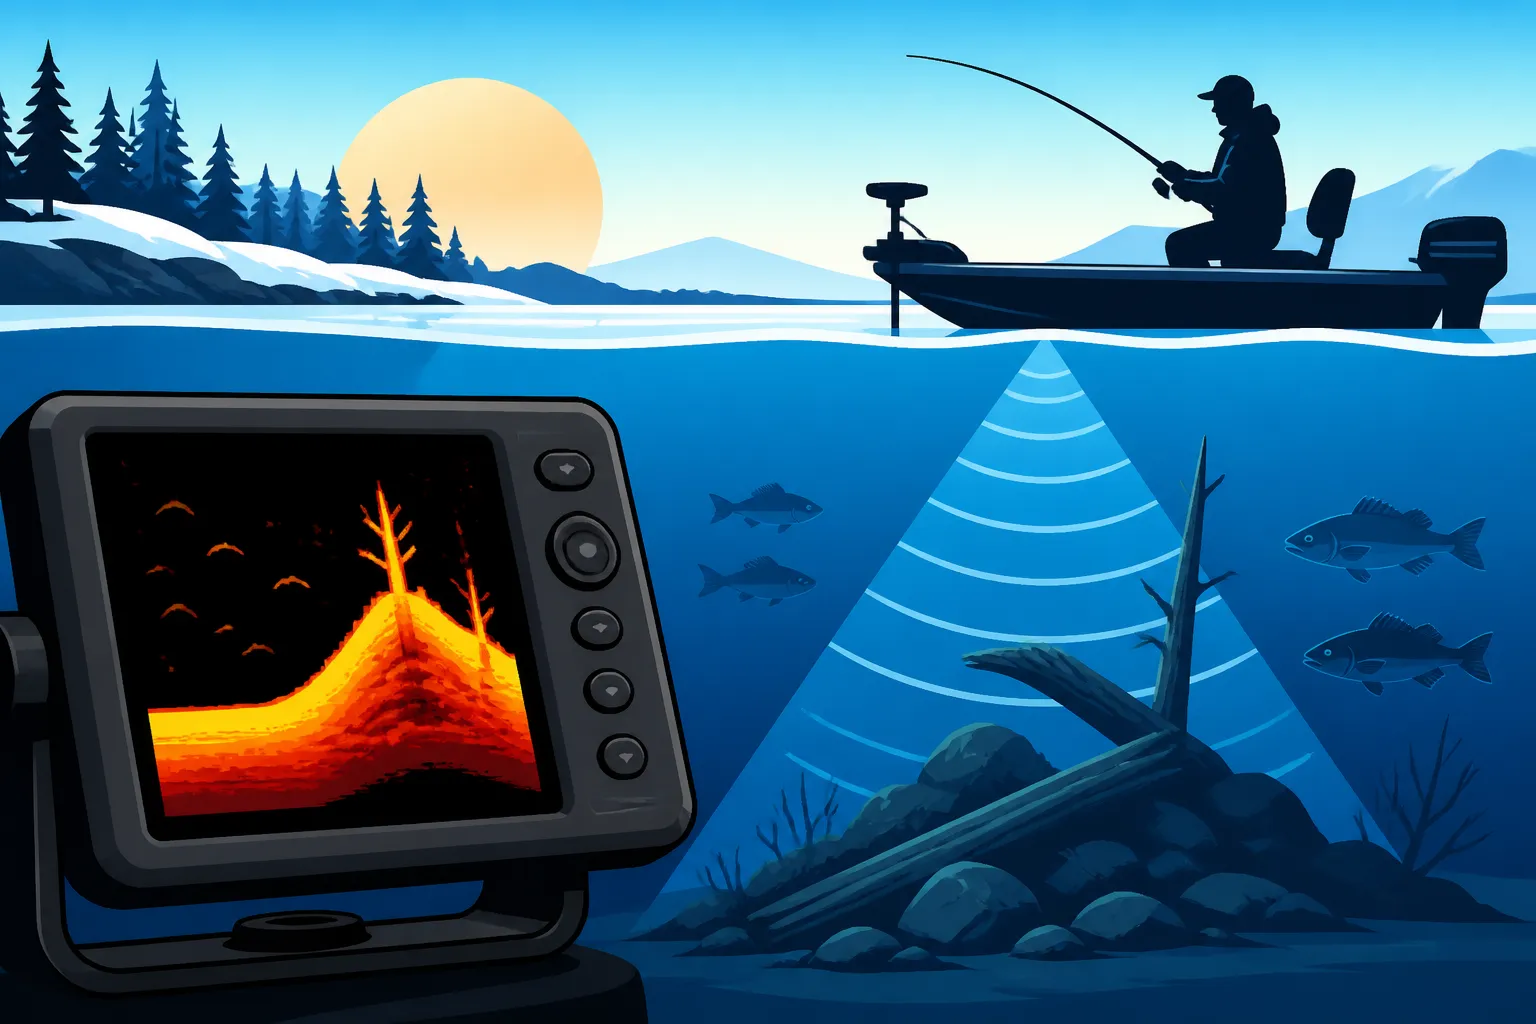
Rocky areas, often prime lake trout and walleye habitat, will typically show up as a harder return on your 2D sonar, appearing as a thick, often yellow or red band, depending on your colour palette. Softer bottoms, like mud or silt, will show a thinner, less intense return. Being aware of the typical depths you're targeting—whether it's suspended lake trout in 60-100 feet of water or walleye holding on a shallower 20-40 foot hump—will directly influence your range and gain settings. For instance, if you're primarily hunting deep lake trout, you'll need a wider depth range to ensure you're seeing the entire water column. Conversely, if you're focusing on a specific rock pile at 30 feet for walleye, zooming into that specific depth range will give you a much clearer picture. Understanding these nuances of Cold Lake Lake Trout Fishing will greatly assist in interpreting your sonar.
Essential Sonar Settings for Pinpointing Structure on Cold Lake
Now we get to the fun part: dialing in those settings. This isn't a one-and-done process; Cold Lake's conditions can change, from bright, calm days to choppy, overcast ones, and you'll need to adjust on the fly. Think of it as tuning a radio to get the clearest signal.
Adjusting Sensitivity, Gain, and Power
These three settings are interconnected and fundamentally control how much detail your fish finder picks up.
- Sensitivity/Gain: This is perhaps the most crucial setting for revealing structure. Too low, and you'll miss faint returns from smaller fish or subtle changes in bottom contour. Too high, and your screen becomes a cluttered mess of noise and interference. The goal is to set it as high as possible without introducing excessive clutter. On Cold Lake, especially when scanning deeper waters for lake trout, you'll likely run a higher gain than you would in a shallow prairie pond. Start by setting your gain to auto, then gradually increase it manually until you start seeing noise. Back it off just a touch from there. When you’re over a known piece of structure, like a prominent rock pile or a steep drop, experiment with boosting the gain to see if you can resolve finer details, such as baitfish congregating near the structure or fish hugging the bottom. This fine-tuning process is particularly important for discerning subtle features on the lake bed.
- Power: This refers to the strength of the sonar pulse sent by your transducer. More power means your signal can penetrate deeper and provide stronger returns, which is obviously beneficial in a deep lake like Cold Lake. Most units will have a fixed power output, but some advanced models allow adjustment. Ensure your unit is operating at its maximum recommended power for the best results in deep water. If you're experiencing weak returns, check your power settings if adjustable, and ensure your transducer is clean and properly installed.
Fine-Tuning Range, Zoom, and Chart Speed
These settings dictate how you view the underwater world on your screen.
- Range: This sets the total depth displayed on your screen. For searching across Cold Lake, especially when targeting lake trout, you'll often want your range set to encompass the full water column you're interested in, perhaps 0 to 150 feet or even more, depending on the specific area's depth. However, once you've found a promising contour or structure, narrowing your range to "bottom track" can be incredibly effective. For example, if you find a hump at 40 feet, setting your range from 30 to 50 feet will magnify that area, making subtle changes in height or the presence of individual fish much more apparent.
- Zoom: This works hand-in-hand with range. Many units offer a bottom zoom feature, which essentially magnifies the bottom portion of your screen, making it easier to see fish holding tight to the structure. This is invaluable when you suspect fish are hunkered down, or when you're trying to differentiate between a large rock and a fish on the bottom. Consider how this can help when exploring best fishing spots on Cold Lake.
- Chart Speed: This controls how quickly the sonar history scrolls across your screen. A faster chart speed gives you a more real-time view, which is excellent for identifying changes in structure as you move. It essentially "stretches" out the returns, making it easier to distinguish individual fish or closely spaced contours. Conversely, a slower chart speed compresses the history, which can be useful for seeing trends over a longer stretch of water. For actively searching for structure on Cold Lake, a medium to fast chart speed is generally recommended, allowing you to react quickly to what your sonar is revealing.
Noise Rejection and Surface Clarity Filters
These filters help clean up your screen by reducing unwanted clutter.
- Noise Rejection/Interference Rejection: This setting helps filter out electrical interference from your boat's engine, trolling motor, or other electronics. If your screen is filled with random dots or lines that don't look like fish or structure, increasing your noise rejection can often clean it right up. Be careful not to set it too high, however, as it can sometimes filter out actual fish signals as well.
- Surface Clarity/Filter: This setting is designed to reduce clutter caused by air bubbles or debris near the surface of the water, especially when you're moving at speed. Cold Lake can get quite choppy, and a well-adjusted surface clarity filter can make a big difference in seeing targets in the upper water column without getting bogged down in surface noise. Again, balance is key: too aggressive, and you might miss fish suspended near the surface, which is sometimes where hungry lake trout can be found.
Utilizing Advanced Sonar Views for Cold Lake's Submerged World
Modern fish finders offer more than just traditional 2D sonar. Down Imaging (DI) and Side Imaging (SI) have revolutionized how we find and interpret structure, giving us a much clearer picture of what lies beneath and to the sides of our boat.
Decoding Down Imaging and Side Imaging for Rocky Formations
If your unit has Down Imaging or Side Imaging capabilities, you're in for a treat when searching Cold Lake.
- Down Imaging (DI): This technology provides a picture-like view directly beneath your boat. Instead of arches, fish appear as distinct dots or blobs, and structure looks incredibly realistic. For rocky formations, like underwater pinnacles or boulder fields, Down Imaging is a game-changer. You can clearly see the individual rocks, the crevices between them, and even the shadows they cast on the bottom. This detail allows you to identify exactly where fish might be ambushing prey. For example, you might see a clear image of a submerged Christmas tree or a collection of boulders that 2D sonar might only show as an indistinguishable lump. This is especially useful for targeting walleye holding tight to submerged cover.
- Side Imaging (SI): This is like having underwater radar that scans out to the sides of your boat, often hundreds of feet in each direction. On Cold Lake, where finding those expansive but subtle humps or long, gradual drop-offs can be challenging, Side Imaging excels. You can cover massive amounts of water quickly, "seeing" structure that you might have otherwise driven right over with traditional 2D sonar. Imagine cruising along, and suddenly you see a detailed image of a massive rock reef or a significant weed line extending out 100 feet to your left – all without ever driving directly over it. Side Imaging reveals the "big picture" of the underwater landscape, allowing you to identify fish-holding zones and then circle back to investigate with 2D or Down Imaging. Many high-end units available on Amazon feature excellent Side and Down Imaging, providing unmatched clarity for structure fishing. Understanding the local Alberta Fishing Regulations Explained is always a good idea, regardless of your tech setup.
Interpreting 2D Sonar for Humps, Drop-offs, and Canyons
While DI and SI offer incredible detail, don't underestimate the power of your traditional 2D sonar, especially once you learn to interpret its unique language.
- Humps and Mounds: On 2D sonar, a hump will appear as a gradual rise in the bottom line, often with a harder, brighter return on top. Fish holding on or near the top of the hump might appear as strong arches or blobs, depending on their size and how directly you pass over them. The key is to look for distinct breaks in the bottom contour, not just a flat line. These subtle rises can be magnets for walleye.
- Drop-offs and Ledges: These are arguably the most classic structure for both lake trout and walleye. On 2D sonar, a drop-off will show a sudden, steep change in the bottom line. The steeper the drop, the more pronounced the vertical line will be. Look for fish suspended along the face of the drop, or at the base where it meets the deeper flat. These are often thermal breaks or ambush points.
- Canyons and Trenches: In deeper parts of Cold Lake, you might find underwater canyons or trenches. These will appear as V-shaped dips in the bottom contour on your 2D screen. Fish, especially lake trout, can often be found patrolling these deep-water features, particularly along their edges. Learning to spot these on your 2D sonar allows you to target areas that might be overlooked by other anglers. Remember, the colour intensity on your screen often indicates the hardness of the bottom or the strength of the return, so brighter colours usually mean harder structure.
Practical Application: Finding Fish-Holding Structure on Cold Lake
Knowing your settings is one thing, but putting it all together on the water is where the real magic happens. It’s about being observant, making constant micro-adjustments, and understanding what you’re seeing.
Strategies for Locating Lake Trout and Walleye Habitat
Cold Lake offers fantastic opportunities for both lake trout and walleye, but their preferred structures can differ.
- Lake Trout: These deep-water predators often relate to deep structure like submerged islands, humps in vast expanses of deep water, and steep drop-offs into the abyss. When searching for lake trout habitat, run your sonar with a wide depth range (e.g., 0-200 feet) and a medium-to-high gain. Utilize a lower frequency (like 50 kHz or a wide CHIRP cone) to scan a larger area, looking for changes in bottom contour or schools of baitfish suspended in the water column. Once you identify a promising hump or drop-off with 2D or Side Imaging, switch to a higher frequency (200 kHz or narrow CHIRP) or Down Imaging to pinpoint individual fish or tighter schools. Look for "bait balls" near structure, as lake trout are rarely far from their food source. Trolling patterns that crisscross these structures are highly effective, and having your sonar dialed in will show you precisely when you're over the prime zone. If you're keen on targeting these elusive fish, learning How to Catch Lake Trout in Alberta could be your next step.
- Walleye: While walleye also use deeper structure, especially in the summer, they often relate to shallower humps, rocky points, and weed lines that transition into deeper water, typically in the 20-50 foot range. For walleye, you might adjust your range to focus on these shallower depths. High gain is still important to pick up subtle bottom features and individual walleye, which often hug the bottom closely. Side Imaging is incredibly effective for quickly locating those extended rock reefs or submerged points that extend into the main lake basin. Once found, use Down Imaging to confirm the structure and look for fish. Walleye will often show up as distinct marks right on the bottom line. Pay close attention to areas where hard bottom meets soft bottom, or where current might sweep across a point, as these are often prime feeding zones. A good quality fish finder, which you can research on Amazon, can significantly improve your success rates for both species.
| Sonar Setting | Cold Lake Depth (feet) | Target Species | Structure Type | Recommended Adjustment |
|---|---|---|---|---|
| Sensitivity/Gain | 60-150+ (Deep) | Lake Trout | Deep Humps, Drop-offs | High (manual adjust to just before clutter) |
| Sensitivity/Gain | 20-50 (Shallow/Mid) | Walleye | Rocky Points, Humps | Medium-High (manual adjust) |
| Frequency | 60-150+ (Scanning) | Lake Trout/Walleye | Wide Area Scan | Low (50kHz or wide CHIRP) |
| Frequency | 20-150+ (Detail) | Lake Trout/Walleye | Pinpoint Structure/Fish | High (200kHz or narrow CHIRP) |
| Range | 0-200+ (Scanning) | Lake Trout/Walleye | Full Water Column | Wide Auto or Manual |
| Range | Bottom Track (Focus) | Walleye | Specific Hump/Ledge | Narrow Auto or Manual (e.g., 30-50 ft) |
| Chart Speed | All Depths | Lake Trout/Walleye | Active Search/Trolling | Medium to Fast |
| Noise Rejection | All Depths | All Species | Electrical Interference | Low to Medium (adjust as needed) |
| Surface Clarity | All Depths (especially choppy) | All Species | Surface Clutter | Low to Medium (adjust as needed) |
| Zoom | Specific Structure | Walleye/Lake Trout | Bottom Detail | Use Bottom Zoom |
Troubleshooting Common Sonar Challenges
Even with the best units and settings, you'll encounter challenges.
- Cluttered Screen: If your screen is too noisy, first reduce your sensitivity/gain incrementally. If that doesn't work, check your noise rejection settings. Lastly, consider if you have electrical interference; sometimes turning off other electronics one by one can help diagnose the culprit. A transducer that's not in clean water or has marine growth can also cause clutter.
- Weak or No Bottom Read: In very deep water on Cold Lake, your unit might struggle to find the bottom. Ensure your power is maxed out and try switching to a lower frequency for better penetration. Check your transducer for obstructions or damage. If you're moving too fast, your transducer might not be getting a good read, so slow down.
- Confusing Returns: Sometimes, fish look like structure, or vice versa. This is where experience and combining 2D with Down Imaging and Side Imaging really helps. A true fish return will often show distinct characteristics (like arches on 2D if you're directly over them, or distinct blobs on DI). Structure will have a more consistent pattern. Learning the different Trout Species Identification Guide for Alberta is also helpful for knowing what you're looking for. The best remedy here is time on the water, comparing what you see on your screen to what you pull up on your line! A reliable fish finder is an investment, and many anglers start their research by comparing models and features on Amazon. Don't be afraid to pull up the manual for your specific unit; they often contain excellent troubleshooting tips tailored to your device.
By understanding these settings and practicing their application on the water, you'll transform your fish finder from a confusing gadget into an indispensable tool for unlocking the secrets of Cold Lake's incredible fishing grounds. Tight lines!
Disclaimer
This article is for general informational purposes only and does not constitute professional advice. Laws, prices and regulations vary by location and change over time. Consult a qualified professional for guidance on your specific situation.